Category: Builds

  • 572 (!!) Big Block Powered 1969 Camaro

    572 (!!) Big Block Powered 1969 Camaro

    img_5990

    Shortly after moving in to the new location, we were visited by this very nice 1969 Chevrolet Camaro, and were pleasantly surprised to see a 527 Big Block stuffed under the hood! Nice though it was, there was a little something missing under the hood. We were tasked with replacing the classic style Edelbrock intake filter with a custom twin intake, with the intention of leaving the outside of the hood uncut.

    img_5974 img_5978 img_5980

    img_5975 img_5985

    img_5971Needless to say that we were up for the task! Shout out to 302 Polishing Solutions for getting things looking very fresh!

  • Audi On Air

    Audi On Air

    img_5339

    Of late, Audis have become an increasingly popular platform for stance enthusiasts. Seeing Audis on air ride has become a popular site, with just about every model making for a perfect candidate. One model though that has not been done quite as often is the Audi RS4, a V8 powered, snarling beast of a machine. Well, now this beast can lay down when it comes to a stop!img_4997

    The RS4 provided its own set of challenges with the air ride, as the kit needed some coaxing to get installed. Overall though, the job went smoothly, and the results speak for themselves!

    img_5127 img_5157 img_5183 img_5326 img_5328

    img_5325img_5344

    img_5333 img_5335

    Have you got a less-common car that you’d like to have cruising on air? Contact us!

  • Von Taube Motorsports – LS Powered 350z

    Von Taube Motorsports – LS Powered 350z

    The Nissan 350z has been a prominent part of the motorsports world since it’s production run began in 2003. In that span of time, the 350Z has been a popular platform both for a street sports car, as well as a dedicated race car. With all that being said, the 350z made for an ideal choice for Eric from Von Taube Motorsports to use as the base for his dedicated track vehicle.

    Eric intended on going pretty fast in this machine, meant to be a purpose-built Time Attack vehicle. The first concern, as always, is safety. A full roll cage was to be built and installed to meet various Time Attack competitions’ safety guidelines…but before we could do that, the sound deadening needed to be removed, pictured above.

    Brad got busy prepping the dashboard to have it mounted to the rollcage tubing, as opposed to the factory equipped dash bar that the car comes with. This may seem like a mostly unimportant step in the process, but it’s worth noting that many racing series in the world require that cars retain their factory dashboards for one reason or another. This can be an expensive issue to rectify for the gung-ho enthusiast that throws his old dashboard in the bin because he thinks a panel of aluminum will be lighter (it isn’t, really) or because he wants to make a sweet custom dash and doesn’t want to be restricted by the confines of a factory dash unit. Moral of the story: no matter how awful your dashboard may be, it’s very likely worth saving it until you know for sure that you don’t need it anymore. It’ll save you from the trouble of finding a used one, shelling out big bucks for a new one; or at worst being unable to find one at all.

    With roll cage fabrication steaming right along, let’s take a look under the hood!

    That ain’t no VQ35! As the title of this post implied, along with getting the full roll cage treatment, this vehicle also received a heart transplant in the form of a Chevy LS2!

    Pages: 1 2 3

  • WINTER WARFARE

    WINTER WARFARE

    IMG_0898

    So yeah, I called this post Winter Warfare ’cause it sounds badass. It is sort of an accurate description of this year’s winter season at Cyrious Garageworks though!! Let’s take a couple quick looks at some of the projects being worked on in the cold winter months!

    1975 International Scout

    IMG_3292
    IMG_3298

    This 1975 International Scout came to us with the lemon meringue paint scheme: yellow on the bottom and white on the top with a white interior. A nice colour if we’re talking about desserts, but not so great when you’re talking about a truck that might be doing some offroading duty.

    IMG_0174
    IMG_0300
    IMG_0263
    IMG_0283

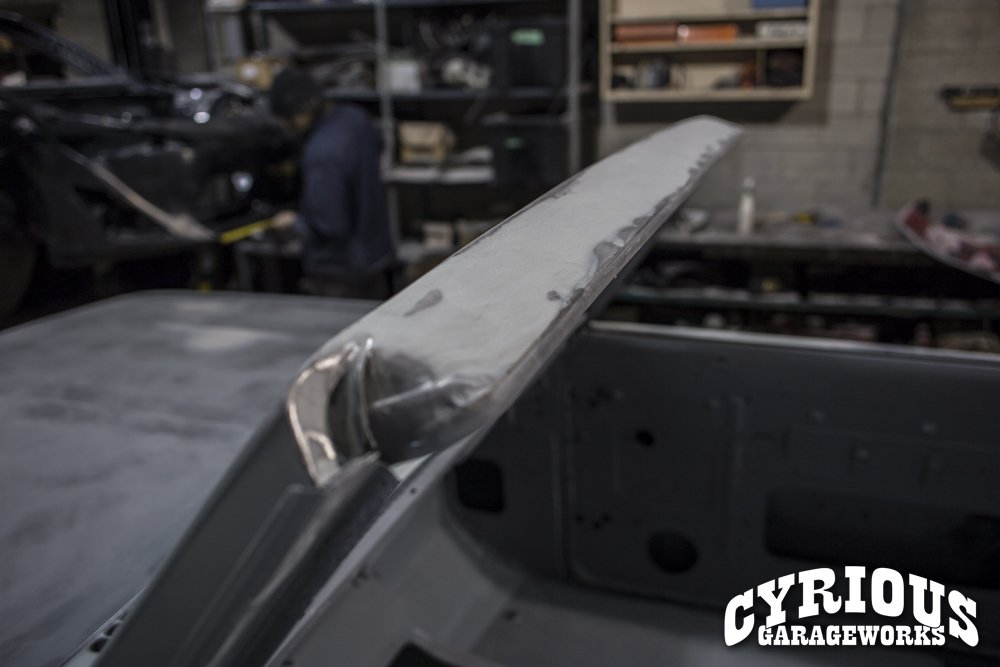
    After being disassembled, this vehicle was sent out for a thorough sand blasting and brought back here for bodywork. This project definitely required lots of smoothing out, especially so since (as I’m sure you can tell) the roof was removed, never to be reinstalled. This vehicle isn’t likely to see any kind of winter service, so the roof was really just added weight at that point. This made it so that there were some ridges along the edge of the bed and the windshield frame that needed to be shaved down and smoothed out.

    IMG_0869
    IMG_0871

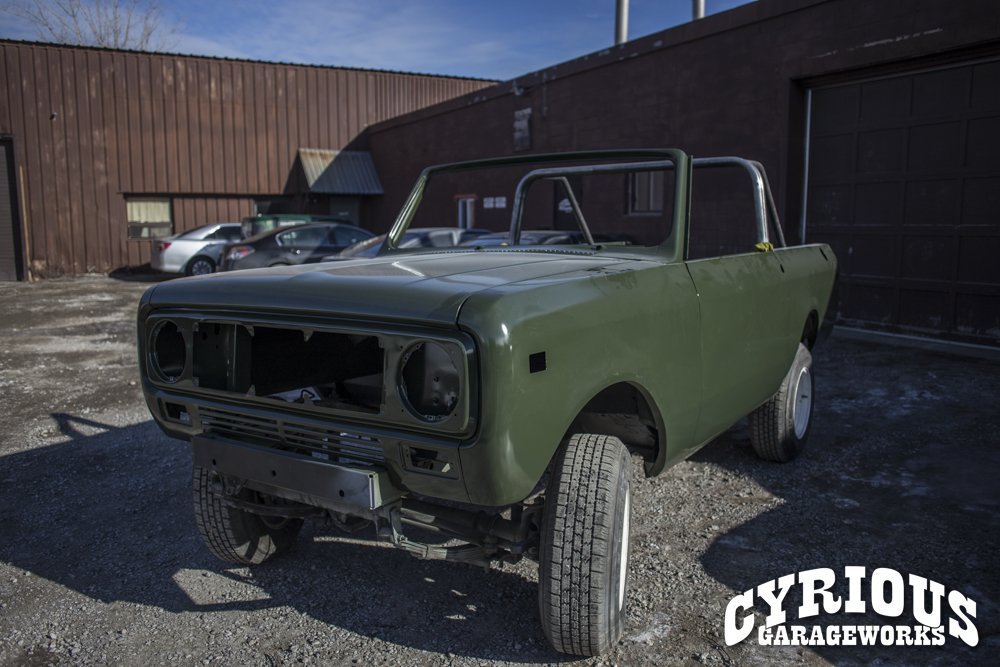
    After some heavy bodywork, the Scout made its way over to the paint shop for a coat of something a little meaner than the lemon meringue yellow. This forest/army green will definitely give off a bit more attitude than the previous colour. Now that the bodywork is pretty much all done, the next step is reassembly and the small matter of doing an engine swap and lift kit!

    Pages: 1 2 3 4

  • Roll Cages Galore!

    Roll Cages Galore!

    IMG_0045

    We’ve had several cars in for roll cages recently of all different shapes and sizes, and they’re showing no sign of letting up! From Targa Newfoundland to drifting and beyond, our roll cages can meet any specification you require!

    BMW E46 – Targa Newfoundland

    This BMW E46 was slated to run in Targa Newfoundland this year, so a roll cage was indeed required! The customer wanted to leave the option open for potential future rally endeavours, so he opted for a beefier cage than what was required from the Targa Newfoundland rulebook.

    IMG_0206
    IMG_0227
    IMG_0228 (2)
    IMG_0229
    IMG_0238
    IMG_0251
    IMG_0255
    IMG_0257

    Pages: 1 2 3 4 5

  • 2013 Scion FR-S Kraftwerks Supercharger: Installed!

    2013 Scion FR-S Kraftwerks Supercharger: Installed!

    SUPERFRS10

    Though a large portion of our clientele here at Cyrious Garageworks are interested in restoring older cars, we do get plenty of modern fare here as well! This time around we had a 2013 Scion FR-S which was in some dire need of boost, and we were happy to oblige! After some research and deliberation, we decided that the Kraftwerks FR-S Supercharger kit looked like our best bet for good product quality, good fitment, and ease of installation. Of course, most importantly, we wanted a supercharger that would make plenty of jam, and do so reliably.

    SUPERFRS6To the casual observer, there’s actually not much difference here from a stock FR-S other than the intercooler and intake, which can be credited to the somewhat low-key design employed by Kraftwerks. A more educated observer however, would probably be able to fairly easily tell exactly what’s going on here. As a testament to the good production quality by Kraftwerks, no cutting or fabrication was needed to get the supercharger kit installed on this car, which is a big plus for somebody who doesn’t necessarily want to start cutting up their still-new FR-S.

    SUPERFRS4

    It’s pretty amazing to think that all this stuff fits under the front bumper without any kind of modification, but it’s true! Maybe the Toyota engineers designed it this way to allow for this kind of mod? One thing’s for sure, you’re certainly not gonna be able to stuff anything else in that area!

    SUPERFRS7This bracket serves as both a really cool finishing piece as well as being the upper support bracket which attaches all of the hardware to the FA20 motor.

    SUPERFRS8

    This neat little add-on made it a lot easier to get the AEM Air/Fuel gauge mounted up without having to drastically modify the dash. This is definitely ideal for someone who wants a discrete gauge location without cutting into things.

    SUPERFRS12

    Along with the other things we’d done already, the brakes were in need of some attention. The stock brakes were somewhat ho-hum on this little sports car, so we changed a few things to get the brakes on par with the sportiness of the rest of the car.

    SUPERFRS17

    New HAWK pads will come in handy to get the car slowed down with it’s new-found power…

    SUPERFRS13

    …and the calipers got freshened up with a couple coats of paint.

    SUPERFRS18 Last but not least, we replaced the old rotors with new, slotted rotors on all corners. Not only does it look better, but it stops more effectively as well!

    SUPERFRS5

    With everything installed and ready to go, it was now up to our pal Sasha from Onpoint Dyno to get this car tuned and ready to rip!

    RichardEscobarSo when all was said and done, this car wound up coming in just under the 300whp mark! That’s up 100hp from stock, which is a pretty impressive gain for a bolt on supercharger and a tune!

  • BUILD: ‘Salt and Pepa’ 20v 4AGE AE86

    BUILD: ‘Salt and Pepa’ 20v 4AGE AE86

    IMG_0107 (2)

    As the years go by, AE86s are slowly becoming more and more extinct. Whether it’s enthusiasts buying them all up and locking them in their garages to tinker on for years, or whether they’re all being made into drift cars and subsequently thrashed or crashed, one way or another it has become nearly impossible to buy a “nice” AE86 without it being crashed, stripped, or a rust bucket.

    Fortunately for those of us with a soft spot for the AE86 there are still some really clean examples out there, and this one is no exception. This car came to us in a somewhat rough shape. Although not visibly in that bad of a shape on the outside, the car was hardly running as it rolled through our door with a long to-do list attached to it. 

    20v4ag1

    As you can see the car was definitely a good looking AE86 right out of the gate. This one had minimal rust, apart from some of the more common problem areas. Still, although at first glance one would think that there’s nothing wrong with the exterior of this car, there was some hidden stuff that needed addressing before she received a fresh coat of paint. Obviously, any kind of imperfections or small dents in the fenders/body must be smoothed out…

    20v4ag2

    …and the door which had been opened way too far at some point would also need to be fixed. There was more bodywork to be done, but we’ll get to that a little bit later. If you were looking closely, you probably would’ve noticed that this AE86 came to us already swapped to a 20 valve Blacktop 4AGE. You may at first think that this is a good thing, but actually it really wasn’t. The problem was that it came to us looking like this:

    20v4ag3

    Many cables were left completely unplugged and hanging, a few vacuum hoses were blocked off, and there was an MSD ignition coil somehow wired into the headlights, among other oddities that I won’t bother listing here. Needless to say, the car could hardly even move under its own power.

    Another big problem with 20v 4AGE installs is that there are several different methods on how to actually get the ignition system to work in the AE86 chassis, as this motor was originally developed for FWD cars. One method involves using a kit which you can order from New Zealand (or Australia, I don’t remember which). The kit entails cutting a big hole in the timing cover and attaching an adapter onto the cams so that you can run the distributor on the front of the motor instead of in the back like stock. Though it seems like a good idea at first, what they fail to mention is that this kit causes excessive wear on the cam gears; making it somewhat less than desirable.

    Another method is to change the ignition system to ‘coil-on-plug’ which involves getting ignition coils from a newer car and mating them to the 20v 4age. This is probably the least painful way of doing things, as it is for the most part a plug-and-play option.

    The last option is to actually keep the distributor right where it’s supposed to be from the factory, and add some clearance to the firewall to make everything fit.

    This one, however, found yet another way to do it:

    20v4ag4

    No, I’m not kidding. We did indeed find the firewall with a massive hole that looks to have been cut using a corkscrew, or safety scissors. In place where the firewall used to be was now a piece of somewhat flammable insulation, with carpet behind that. Needless to say, this was something that we needed to fix before going any further. We considered switching to an alternative method of ignition, but decided to keep it as it was since the firewall had already been modified.

    20v4ag5

    There! Much better! At the very least, now there’s significantly less risk of a fire entering the cabin in the event of such an emergency.

    20v4ag6

    It’s always amazing to see how much bodywork goes into a “near perfect” car to get it that much closer to “perfect”. There’re a couple extra bits going on here, however: the antenna holder has been removed from the front fender to make things a bit cleaner up front; the beginnings of a body-kit are forming on the car, including the fender arches having been chopped to accept wide wheels and fender flares; and the quintessential AE86 TRD rear spoiler has been added for the classic sports car look.

    20v4ag8

    Pages: 1 2

  • Swapped: BEAMS 3SGE AE86

    Swapped: BEAMS 3SGE AE86

    IMG_0273

    Motor swaps are another of the more popular improvements that a lot of people make to their cars, and it can be done for a number of reasons. Sometimes a motor swap can simply be done to replace a blown motor with a not-blown motor. In other cases, motor swaps are done to swap in either a newer, or more powerful (or both) engine for increased performance and reliability.

    Motor swaps can be completed with varying degrees of difficulty. Sometimes the desired motor was actually an option for the prospective car from the factory, so depending on parts availability the swap could actually not involve very much imagination/fabrication as far as fitting the engine, and the main part of the job is just getting everything to work (which isn’t always as easy as it sounds). That however, is not the case with the swap we did to this totally rad AE86 Coupe. This customer opted to swap out the old 4AGE with something quite a bit more modern, but at the same time keeping a Toyota heart in his machine.

    IMG_0187

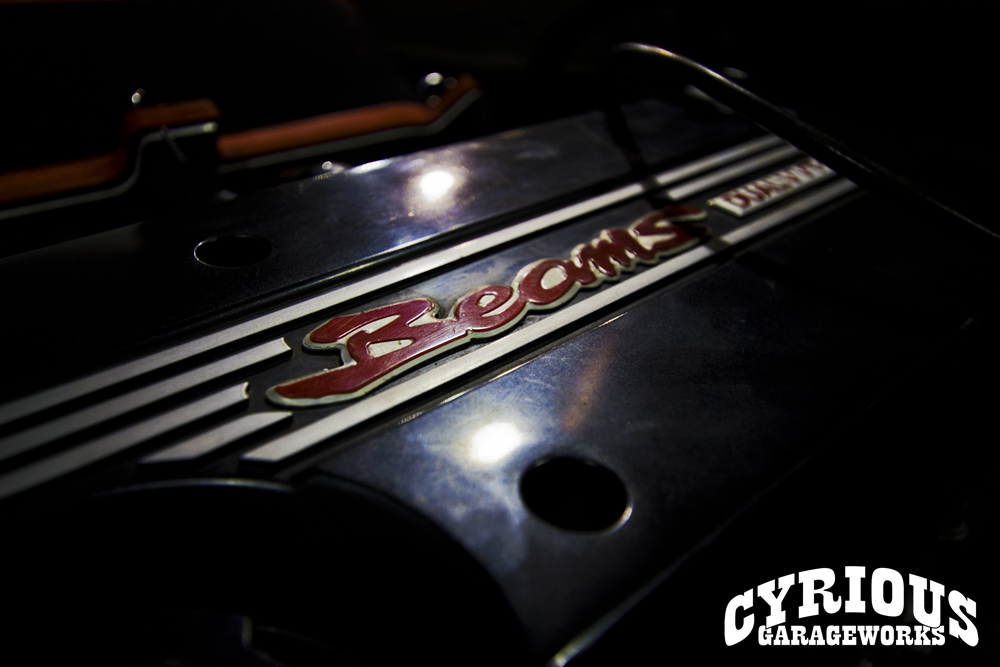
    And here is the motor in question: a BEAMS (Breakthrough Engine with Advanced Mechanism System) 3SGE Blacktop, taken from a 2001 Toyota Altezza RS200. Being a newer motor, it’s pretty clear that this was never a factory option for the ’86 Corolla Trueno. As an added degree of difficulty, however, this particular motor was never a factory option for any car sold here in North America. This meant that any parts that needed to be sourced for the motor itself would require a little bit of researching to find out what kind of alternatives from North American models would be appropriate, if at all possible.

    IMG_0359

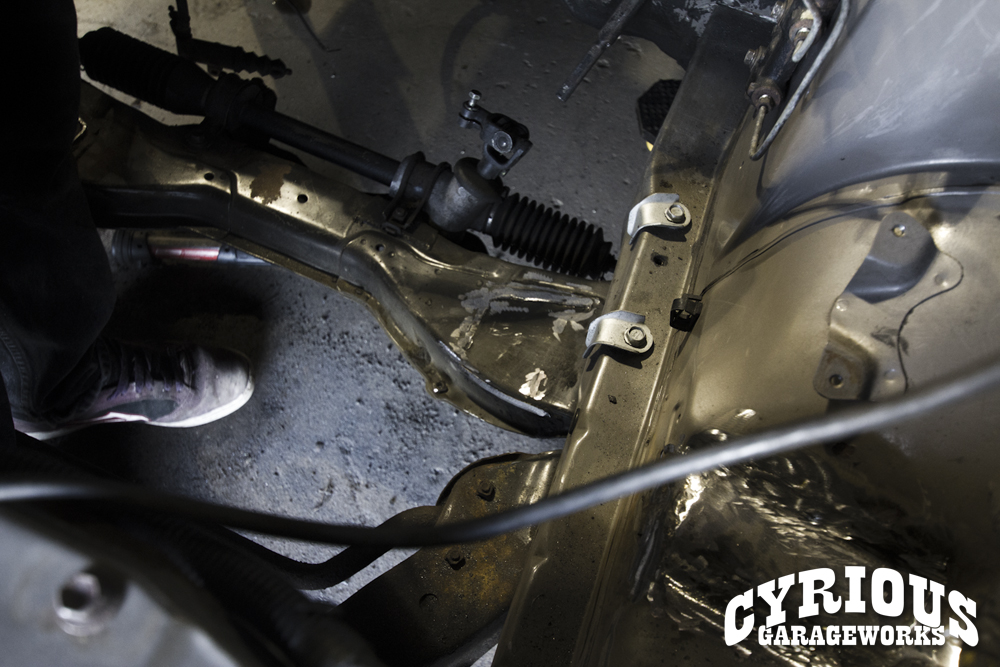
    As with just about any motor swap that wasn’t a factory option, a big part of the installation is getting everything to fit and clear properly. If the motor is mounted too high, the hood would potentially need to be modified (ugly) and there’s a good chance that the transmission won’t fit. On the other hand, if the motor is mounted too low, then the oil pan will be lower than the subframe, making it the lowest part of the car with risk of getting smashed when going over speedbumps or small obstructions in the road. A lot of care has to be taken in order to ensure that the motor is mounted in just the right spot to make everything clear properly, so we decided to modify the subframe to make our own motor mounts for this car.

    IMG_0215

    Perfect fitment was achieved using a combination of solid billet aluminum subframe spacers, as well as our custom fabricated motor mounts and reinforcement on the factory subframe. This made it so that we didn’t have to modify the hood (which wouldn’t have been pretty with it being a fibreglass hood), and so that some minor massaging was needed on the trans tunnel to fit the transmission.

    IMG_0216

    Even with the motor mounted exactly where we wanted it, some modification was still needed to get the oil pan to not fall below the subframe. We modified the oil pan to be a couple centimetres shorter, and that gave us all the clearance we needed!

    IMG_0399

    Once the motor was fitted to the car, we designed and fabricated this custom transmission mount to help hold everything in!

    IMG_0178

    With the motor being swapped, the old exhaust no longer worked so a new one was needed. Besides, what’s a Cyrious build without a custom stainless steel exhaust? Gotta make sure they hear ya comin’!

    IMG_0179

    This car will be seeing plenty of track time in its near future, so we decided to go with a time-attack inspired turn down exhaust. It’s definitely a unique finishing touch for this car, and hints a little bit at the beastly nature of this ultimate gripping machine!

    Pages: 1 2

  • 1988 10AE Mazda RX7 FC3S – From the Ground Up

    1988 10AE Mazda RX7 FC3S – From the Ground Up

    One of our more in depth projects of the past year was this 1988 Mazda RX-7 which came in for a full build.

    Visibly lots of stuff to do on this bad boy. As one may guess from looking at the pictures, this car is very similar to the one used by Ryosuke Takahashi in the Initial D comic, and this build would pull a lot of visual inspiration from that car.

    Lots of bodywork would be necessary from top to bottom to make this car look as good as when it came out of the factory.

    Pages: 1 2

  • Busy busy busy!

    Busy busy busy!

    Everybody knows: once the thermometer creeps above freezing, us car enthusiasts like to drag our beauties out of the garage and get ’em ready for the Summer. Things are no different here in Ontario, and our Spring season is in full swing! That said, we still have plenty of openings, so if you need anything done feel free to give us a call and we’ll set you up with an appointment! For the time being, I’ll leave you guys with this BMW roll cage project we completed this past winter!